Personalize Your Space with Custom Window Decals
Available Products: 60
Product Sitemap
Latest Blogs & News
Contact Us
Basket
Available Products:
60
Product Sitemap
Latest Blogs & News
Contact Us
Basket
Search
Home
Custom Window Decals
Vinyl Stickers
Shop By Size
Personalized Graphics
Clear Window Clings
Personalize Your Space with Custom Window Decals
Product Sitemap
Blogs & News
Contact Us
Basket
Available Products:
60
Search
Categories
• Car Decals
• Business Decals
• Seasonal Decals
• Sports Decals
• Wall Decals
Latest News
•
2026 CS Gallery Window Decals Commission Opportunities - ArtsHub
•
Light Up Leith is great but you can stick your Christmas window decals - Susan Morrison - Edinburgh News
•
Window decals create sticky situation for deterring bird strikes - The Wildlife Society
•
STLPR helps protect migratory birds with window decals - STLPR
•
Window Decals & Stickers - 10 Creative Diwali Decor Ideas To Illuminate Your Home With Festive Ambience - The Economic Times
•
Striking out at bird-window collisions - BC SPCA
•
Aesop revamps storefronts with algae-based window decals - Inside Retail Australia
•
City now issues anti-dooring window decals to taxi, Uber, and Lyft operators - BikePortland
•
Google Creates Local "Favorite Places," Connects Online And Offline With Mobile Barcodes On SMB Window Decals - Search Engine Land
•
Window Decals Bring Vinton Storefronts to Life - The Roanoker magazine
•
Window decals to prevent bird collisions only work if installed correctly - The Weather Network
•
Study finds bird decals don’t work indoors - St. Albert Gazette
•
Bird-friendly windows - University of Delaware
•
Window decals to identify 'safe space' for sex worker assistance - CBC
•
Fake Window Decals Pulled In Favor of Real Occupants (Published 1989) - The New York Times
•
Police Warn Bumper Stickers & Decals Could be Putting Your Family in Danger - WKDQ 99.5
•
Who’s to Blame for the Family Car Window Decal Craze? - MotorBiscuit
•
Mid-Continent Public Libraries giving out free window decals for National Library Week - KMBC
•
Las Cruces Police give away free autism awareness decals for World Autism Day - KFOX
•
Help Birds Avoid a Deadly Collision - National Audubon Society
60 x Etched Glass Safety Windows Stickers for Glass - 50mm Round Glass Awareness..
£7.49
548 Reviews
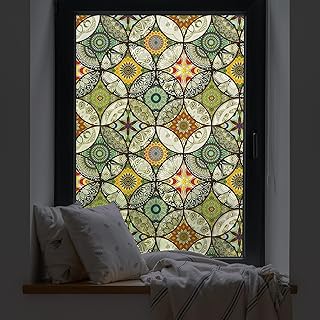
dktie Window Film Vinyl Non Adhesive Privacy Film Stained Glass Window Film for ..
£8.99
2017 Reviews